You know that gritty, sand-like texture you sometimes get in homemade fudge? It’s the worst. Honestly, most people think they’ve messed up the temperature or the chocolate quality, but usually, it's just basic chemistry throwing a tantrum. If you’ve been hunting for a reliable chocolate fudge recipe using marshmallows, you’re probably looking for that specific "Fantasy Fudge" vibe—glossy, pillowy, and so soft it practically dissolves the second it hits your tongue.
The secret isn’t just tossing a bag of Jet-Puffed into a pot. It’s about how those marshmallows act as a "doctoring agent." In professional confectionery circles, we talk about interfering agents. Marshmallows are packed with gelatin and corn syrup, both of which are superheroes at stopping large sugar crystals from forming.
I’ve spent years tinkering with sugar ratios. Most recipes are too sweet. Some are too oily. But getting that perfect bite requires a bit of nuance that most "quick" blogs skip over entirely.
The Science of the "No-Fail" Marshmallow Method
Why use marshmallows at all? Traditional fudge—the kind your great-grandmother might have made in a heavy copper kettle—relies on precise crystallization. You have to boil sugar, butter, and milk to exactly 234°F (the "soft ball" stage), then beat it by hand until your arm feels like it’s going to fall off.
It's exhausting.
By using a chocolate fudge recipe using marshmallows, you’re essentially cheating, but in the best way possible. The marshmallows provide a stable structure. According to food scientist Harold McGee in On Food and Cooking, the presence of corn syrup (which is in the marshmallows) prevents the sucrose molecules from bonding together into those crunchy grains we all hate.
Basically, the marshmallows do the heavy lifting. You get a foolproof result because the gelatin provides a chewy "set" that doesn't rely solely on the temperamental nature of boiled sugar.
Why Texture Is Everything
Some folks call this "Never-Fail Fudge." It’s a bit of a misnomer because you can still ruin it if you’re reckless. If you crank the heat too high, you’ll scorch the milk solids. If you under-boil, it won't set and you’ll end up with a very expensive chocolate soup.
I remember the first time I tried this. I was twelve, using a recipe off the back of a marshmallow fluff jar. I didn't realize that "boil for five minutes" meant a full, rolling boil—the kind that bubbles up even when you’re stirring. I ended up with a tray of chocolate goo that we had to eat with spoons. It tasted great, sure, but it wasn't fudge.
Gathering Your Ingredients: Quality Actually Matters
Don't buy the cheapest chocolate chips you can find. Seriously. Cheap chips are loaded with stabilizers and waxes designed to help them keep their shape in a hot oven. That’s the opposite of what you want for fudge. You want chocolate that melts into a pool of velvet.
- The Chocolate Base: Go for a mix of semi-sweet and milk chocolate. Using 100% milk chocolate often makes the fudge too soft and cloyingly sweet. A 60% cacao bittersweet chip balances the sugar in the marshmallows perfectly.
- The Marshmallows: Freshness is key. If your marshmallows are stale and stuck together in the bag, they won't melt evenly. You’ll end up with white lumps in your dark fudge. Some people prefer marshmallow creme (fluff), but mini marshmallows actually provide a more consistent set due to the higher gelatin-to-sugar ratio.
- Evaporated Milk: Not sweetened condensed milk. These are two very different beasts. Evaporated milk provides the richness without the overwhelming sugar of the condensed version.
The Gear You'll Need
You don’t need a laboratory, but a heavy-bottomed saucepan is non-negotiable. Thin pans create hot spots. Hot spots create burnt chocolate. Burnt chocolate tastes like sadness.
- A 3-quart saucepan (wider is better than deeper for even evaporation).
- A silicone spatula (wood absorbs odors; nobody wants garlic-scented fudge).
- An 8x8 inch square pan lined with parchment paper. Leave an overhang—this "sling" lets you lift the whole block out for clean slicing later.
The Step-by-Step Reality of a Chocolate Fudge Recipe Using Marshmallows
Let's get into the actual process. Forget the "dump and stir" myths. There is a rhythm to this.
First, combine your sugar, butter, and evaporated milk. You want to heat this over medium heat. Don't rush it. If you try to blast it on high, the sugar won't dissolve properly before the liquid starts to boil. Stir constantly. You're looking for a smooth, homogenous liquid.
Once it hits a boil, the clock starts.
The Five-Minute Rule (With Nuance)
Most recipes tell you to boil for exactly five minutes. But "boil" is a vague term. You are looking for a "rolling boil." This means the bubbles are aggressive. They should be popping all over the surface. If you stop stirring and the bubbles disappear, you aren't there yet.
Keep stirring. The mixture will darken slightly and start to smell like caramel. This is the Maillard reaction happening with the milk proteins and sugar. It’s where the flavor lives.
After five minutes of a hard boil, pull it off the heat immediately.
The Folding Phase
This is where the magic happens. Dump in your mini marshmallows and your chocolate chips.
Don't put the pan back on the stove! The residual heat from the sugar syrup is more than enough to melt everything. If you keep heating it, you risk breaking the emulsion, which leads to a layer of yellow oil sitting on top of your fudge. Sorta gross, right?
Stir vigorously. At first, it’ll look chunky and weird. Keep going. Suddenly, the marshmallows will vanish, and the mixture will turn glossy and thick. This is the moment to add your vanilla extract and a pinch of sea salt.
Pro Tip: Always add vanilla at the end. Vanilla is volatile; if you boil it, the flavor evaporates into the air instead of staying in your fudge.
Common Pitfalls and How to Rescue Your Batch
Sometimes things go wrong. It happens to the best of us.
If your fudge feels "oily," it means the fat has separated from the solids. This usually happens because the mixture got too hot or was stirred too aggressively while boiling. You can sometimes save it by adding a teaspoon of very hot water and stirring gently until it re-emulsifies.
If it’s too soft after cooling for four hours, it didn't boil long enough. Don't throw it away! It makes an incredible cake filling or ice cream topping. Or, you can put it back in a pot, add a splash more milk, and try the boiling process again, though the texture will be slightly more "cooked" tasting.
Why Is My Fudge Grainy?
Graininess is the enemy. It usually happens for one of two reasons:
- Undissolved sugar crystals on the side of the pot fell back into the mix. (Tip: Use a wet pastry brush to wipe down the sides of the pan while boiling).
- You stirred it too much while it was cooling.
Once you pour that fudge into the pan, leave it alone. Don't smooth the top fifty times. Don't poke it. Just let it sit at room temperature for at least an hour before moving it to the fridge.
Customizing Your Flavor Profile
Once you master the basic chocolate fudge recipe using marshmallows, you can start playing around.
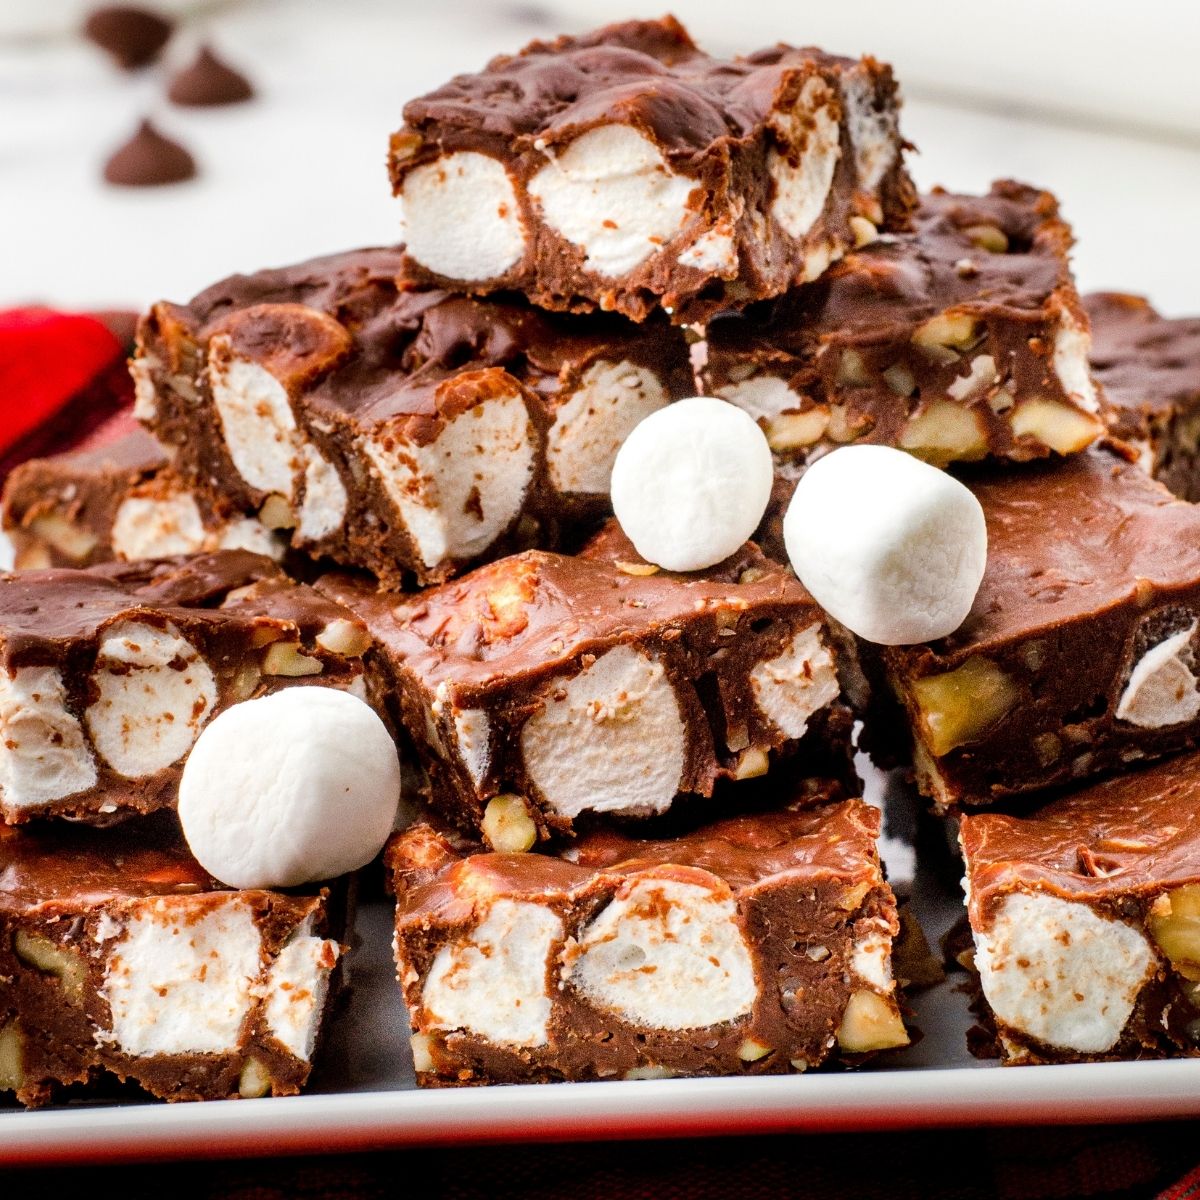
- The "Rocky Road" Variant: Fold in toasted walnuts and a handful of unmelted mini marshmallows at the very last second before pouring.
- The Mexican Chocolate: Add a teaspoon of cinnamon and a tiny pinch of cayenne pepper.
- The Peppermint Crunch: Swap the vanilla for peppermint extract and top with crushed candy canes.
I personally love adding a tablespoon of espresso powder. It doesn't make the fudge taste like coffee; it just makes the chocolate taste "more" like chocolate. It deepens the profile and cuts through the intense sweetness of the marshmallows.
Storing and Serving Like a Pro
Fudge is surprisingly hardy. It’ll last two weeks at room temperature if it’s in an airtight container. If you put it in the fridge, it'll last a month, but the texture gets a bit firmer.
If you're planning to give this as a gift, slice it while it's cold but serve it at room temperature. Use a long, thin knife dipped in hot water (and wiped dry) between every single cut. This gives you those sharp, professional edges that make people wonder if you actually bought it at a high-end candy shop.
The Environmental Factor
Believe it or not, the weather matters. On a very humid or rainy day, sugar absorbs moisture from the air. This can make your fudge softer than usual. If it’s pouring rain outside, you might want to boil your mixture for an extra 30 to 60 seconds to compensate for that extra atmospheric moisture.
Actionable Insights for Your Next Batch
To ensure your chocolate fudge recipe using marshmallows turns out perfectly every single time, follow these specific technical steps:
- Check your marshmallows: Ensure they are fresh and soft. If they’ve started to crystallize in the bag, they will ruin the smooth texture of your fudge.
- The Cold Water Test: If you don't trust your timer, keep a cup of ice water nearby. Drop a small spoonful of the boiling syrup into the water. If it forms a ball that you can pick up and flatten between your fingers, it’s ready.
- Prep everything first: Once that sugar reaches the right temperature, you have to move fast. Have your chocolate, marshmallows, and butter measured and sitting in bowls ready to go.
- Control the heat: Use a medium flame. High heat is the fast track to a scorched pan and a bitter aftertaste.
- Parchment is your friend: Never grease a pan with butter and expect the fudge to come out cleanly. Use parchment paper or foil with a light coating of non-stick spray for a stress-free release.
Take your time with the boil. Watch the bubbles. Smell the change in the sugar. Fudge making is as much about your senses as it is about the recipe. Once you get the "feel" for the marshmallow method, you'll never go back to the temperamental traditional versions.