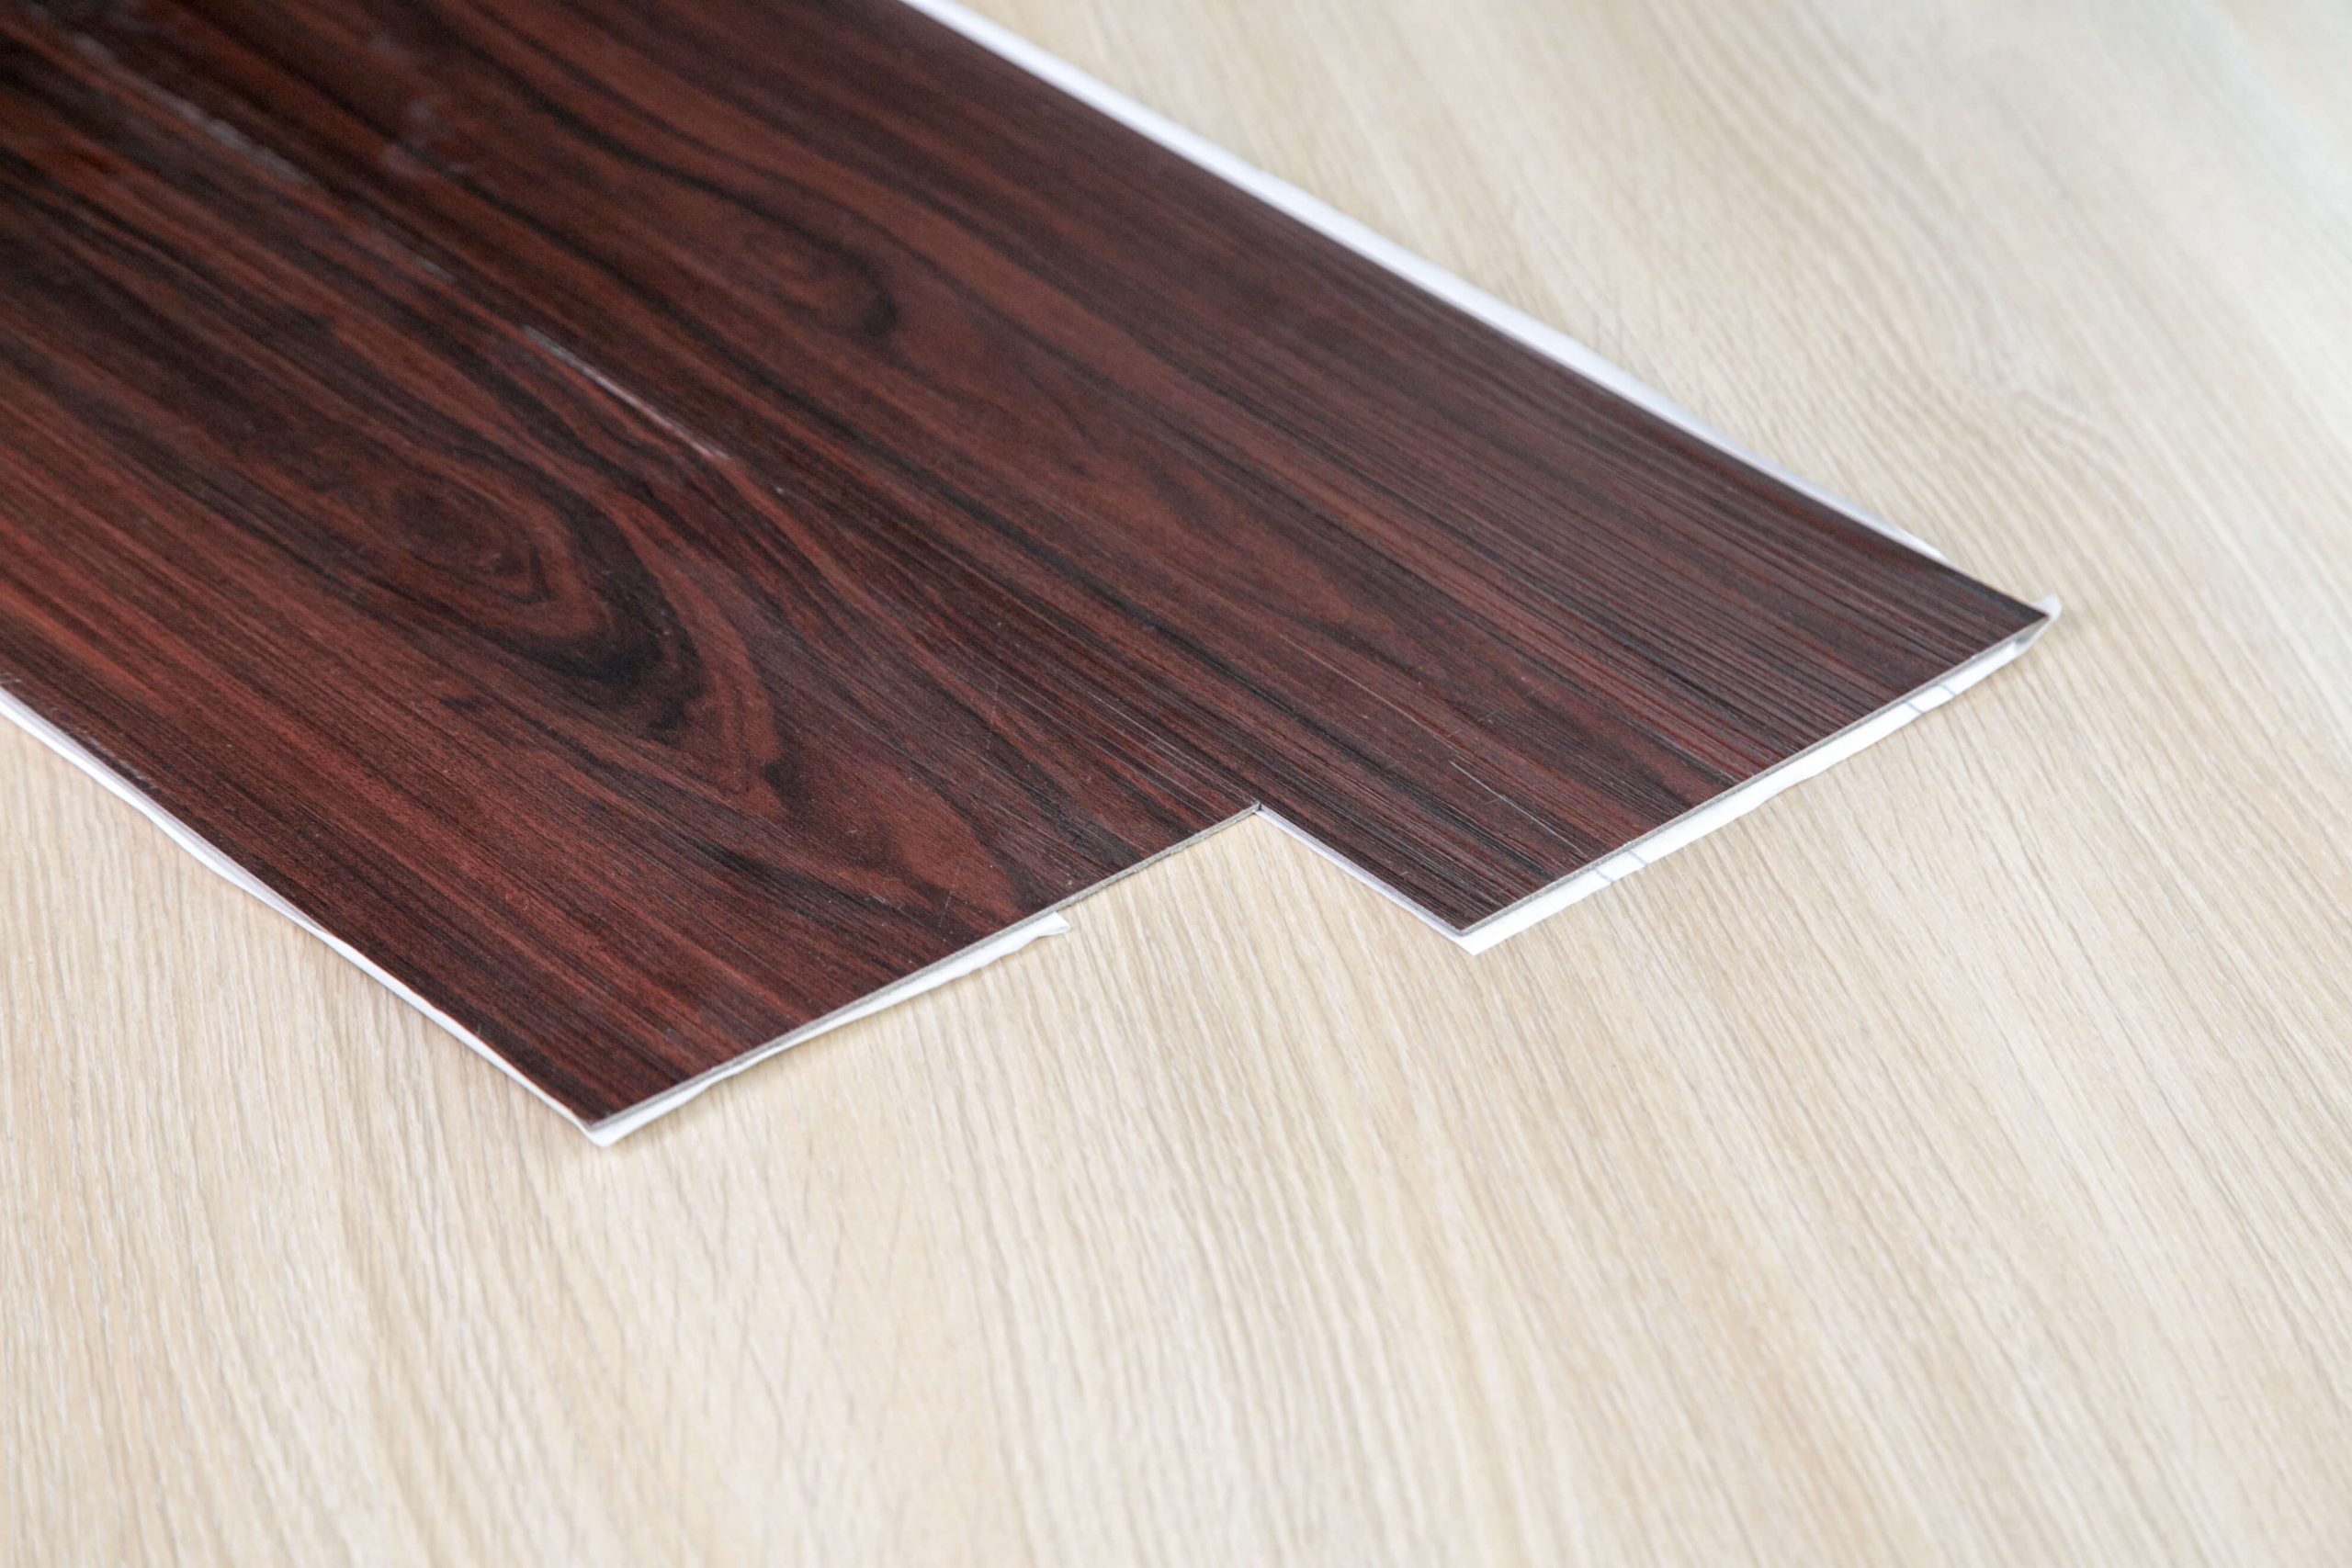
You’re standing in the middle of your kitchen, surrounded by a massive, curled-up roll of linoleum or vinyl that looks more like a giant burrito than a floor. It’s intimidating. Most people think the hard part of a DIY floor project is the cutting or the measuring, but honestly? It’s the vinyl sheet flooring adhesive. If you screw up the glue, the whole project is basically toast. You’ll get those annoying bubbles that look like tiny molehills, or worse, the edges will start peeking up in six months like they’re trying to escape.
Getting it right isn't just about slathering some goop on the subfloor and hoping for the best.
The messy reality of choosing a vinyl sheet flooring adhesive
There’s no "one size fits all" here. If you walk into a big-box store like Home Depot or Lowe’s, you’ll see rows of buckets. Some say "pressure sensitive," others say "permanent bond," and a few might mention "releasable." It’s enough to make your head spin. Basically, the adhesive you need depends entirely on the backing of your vinyl. Is it felt-backed? Is it fiberglass? If you use a permanent bond adhesive on a fiberglass-backed sheet that was meant to be loose-laid or perimeter-bonded, you’re going to have a bad time when it comes time to replace it. Or, it might just chemically react and discolor your expensive new floor.
I’ve seen floors turn a weird shade of yellow because the installer used an old-school multipurpose adhesive with a modern vinyl sheet. That’s a chemical reaction you can’t undo.
Pressure sensitive vs. Hard set
Let's talk about the two main players. Pressure sensitive adhesive (PSA) is like a giant sticker. You roll it on, wait for it to get "tacky"—which means it’s clear and sticky to the touch but doesn't transfer to your finger—and then you lay the floor down. It’s great because you can reposition things a bit. On the flip side, you have hard-set adhesives. These stay wet when you drop the flooring in. Once they cure, they are on there. If you’re putting vinyl in a place with heavy rolling loads—like a home office with a rolling chair or a hospital corridor—hard-set is usually the way to go. It prevents the vinyl from "bubbling" or shifting under the pressure of the wheels.
It's a huge mistake to rush the "flash time." That’s the time the glue needs to sit on the floor before you cover it up. If you trap moisture under the vinyl, you get bubbles.
Why moisture is the secret floor killer
Ask any pro from the National Wood Flooring Association or a certified floor inspector, and they’ll tell you: moisture is the enemy. Even with vinyl. Most people think because vinyl is "waterproof," the installation is invincible. Wrong. If you’re gluing vinyl sheet flooring adhesive onto a concrete slab that’s "sweating" or has high vapor emissions, that glue will eventually emulsify. It turns back into a liquid or a chalky mess.
You’ve gotta test your slab. You can buy a simple calcium chloride test or use a pinless moisture meter. If the slab is too wet, you need a moisture barrier or a specific high-moisture resistant adhesive like Henry 647 or something from Mapei’s Ultrabond line. These are engineered to handle the alkaline environment of damp concrete. Without it, your floor will literally float away from the subfloor.
The "Trowel" factor
Don't just use a brush. Don't use a paint roller unless the bucket specifically says so. The notch size on your trowel matters more than you think. If the notches are too big, you get "telegraphing." That’s when you can see the ridges of the dried glue through the surface of the vinyl. It looks cheap. If the notches are too small, you don't get enough "transfer," and the floor won't stick.
Check the back of the adhesive bucket. It’ll tell you exactly what trowel to use. Usually, it’s something tiny, like a 1/16" x 1/16" x 1/16" square notch. It seems like it's not putting enough glue down, but trust the chemistry.
What about the "Peel and Stick" lies?
We've all seen the commercials. Just peel the backing and stick it down! While that works for individual tiles, sheet vinyl is a different beast. Even if you bought a "loose-lay" vinyl sheet, you usually still need vinyl sheet flooring adhesive around the perimeter or under the seams. If you don't, the floor will expand and contract with the temperature. One day it’s flat, the next day there’s a giant ripple in front of the refrigerator because the sun hit it.
Seam Sealing: The Step Everyone Skips
Glues hold the floor to the subfloor, but seam sealer holds the floor to itself. If your room is wider than 12 feet, you’re going to have a seam. If you don't use a chemical seam sealer (like Armstrong’s S-235 or S-245), water from your mop will seep into that crack. Once water gets under the vinyl, it attacks the adhesive. The edges will curl. It’ll look terrible.
Actually, I’ve seen seams open up in less than a year just from foot traffic because the installer thought the floor glue was enough to hold the edges together. It isn’t. You need that chemical weld.
Flash time and Working time: Don't mess this up
Timing is everything. "Flash time" is how long the glue needs to sit before you lay the vinyl. "Working time" is how long you have to finish the job before the glue dries out and becomes useless.
If it’s a humid day in a basement, the glue might take an hour to flash. If it’s a dry, hot afternoon in a sunroom, it might flash in fifteen minutes. You have to use the "finger test." Touch the ridges of the glue. If it sticks to your glove, it’s too wet (unless you're doing a wet-set install). If it’s tacky but doesn't transfer, it's go-time.
Real talk on Brands
Not all glues are created equal. Professionals tend to stick with what they know because a failure means a "call-back," and call-backs kill profit.
- Roberts 2310: This is a classic. It’s a fiberglass-backed sheet vinyl adhesive that's pretty forgiving for DIYers. It has a decent grab but gives you time to move things around.
- Mapei Ultrabond Eco 373: This is a powerhouse. It’s a "pressure sensitive" adhesive, meaning you can let it dry to the touch and then just press the vinyl into place. It’s got a huge "open time," so you aren't rushing like a maniac.
- TEC Skill Set: Often found at specialty flooring shops. It’s reliable but sometimes pricier.
Is it worth buying the expensive stuff? Yes. Every single time. Saving twenty bucks on a cheap bucket of multipurpose glue is a great way to ruin a thousand dollars worth of flooring.
The porous vs. non-porous debate
This is where the real nuance happens. If you’re gluing vinyl over an old layer of vinyl (which is often okay, as long as it's not cushioned), you’re dealing with a non-porous surface. The glue can’t "soak in." In this case, you must use a pressure-sensitive method where the glue dries completely before you lay the sheet. If you trap wet glue between two layers of plastic, it will never dry. It’ll just stay a gooey, stinky mess forever.
If you're going over raw plywood (porous), you can often do a "wet-set" where you lay the vinyl while the glue is still creamy. This creates a much stronger, permanent bond.
Avoiding the "Stink"
Modern adhesives have come a long way. Look for "Low VOC" labels. VOCs (Volatile Organic Compounds) are what give old-school glues that "brain-melting" chemical smell. Brands like TEC and Bostik now make adhesives that are practically odorless. If you’re doing a small bathroom with no windows, do yourself a favor and get the low-VOC stuff. Your lungs will thank you.
Actionable Steps for a Perfect Bond
Don't just wing it. If you want the floor to stay put, follow this flow.
- Prep the subfloor like a maniac. Every staple, every speck of dust, and every dried paint drip will show through the vinyl. Scrape it, sand it, vacuum it, and then vacuum it again.
- Check your temperature. Most adhesives need the room to be between 65°F and 85°F for 48 hours before and after installation. If the house is freezing because the heat isn't on yet, the glue won't cure properly.
- Roll the floor. This is the step DIYers always skip. Rent a 100-pound floor roller from a tool rental shop. Once the vinyl is down in the adhesive, roll it from the center out to the edges. This breaks down the trowel ridges and ensures 100% contact.
- Wait to walk. Stay off the floor for at least 24 hours. Don't move the refrigerator back in for at least 48 to 72 hours. If you slide a heavy appliance across fresh vinyl, you’ll "plow" the adhesive and create a permanent hump in the floor.
Vinyl sheet flooring adhesive is the silent partner in your renovation. It's not flashy, and nobody's going to compliment you on your glue job, but it's the only thing standing between a beautiful floor and a trip to the landfill. Take your time, read the bucket, and for the love of all things holy, buy the right trowel.