You’re sitting on the couch, and suddenly you hear it—that rhythmic, wet thwack-thwack-thwack of your dog’s ears hitting their skull as they shake their head for the tenth time this hour. It’s annoying. It’s loud. But for your dog, it’s honestly miserable. Most of us reach for a bottle of ear wash for dogs the moment we see a bit of brown gunk or smell something slightly funky. We want to help. However, after years of talking to vets and dealing with floppy-eared breeds like Beagles and Goldens, I’ve realized that most people are actually making things worse by being too aggressive or using the wrong stuff.
Cleaning a dog’s ears isn't just about squirting some liquid in and hoping for the best.
If you do it wrong, you’re just pushing debris deeper into the horizontal canal, which is shaped like a "L." That’s a recipe for a ruptured eardrum or a deep-seated infection that’ll cost you $400 at the emergency vet. Dogs have a very specific anatomy. Their ear canals are much longer and more vertical than ours. Basically, you can't just treat them like a human ear.
The Chemistry of a Good Ear Wash for Dogs
Don’t just grab the cheapest bottle at the big-box store. Seriously. You need to look at the ingredients list because some of that stuff is harsh enough to strip paint. Most effective ear wash for dogs formulas rely on a few specific categories of ingredients. You have your acidifiers, like salicylic acid or acetic acid. These are great because they lower the pH of the ear environment. Yeast and bacteria hate acid. They want a warm, alkaline swamp to live in, and by making the ear slightly acidic, you’re essentially evicting them.
Then there are the cerumenolytics. Big word, simple job: they break down earwax (cerumen). If your dog has those thick, waxy plugs, a simple saline wash won’t do squat. You need something with surfactants or carbamide peroxide to actually melt the gunk.
But here is the catch.
If your dog’s ear is red, raw, and bleeding, you absolutely cannot use a wash with high alcohol content. It stings like crazy. Imagine pouring rubbing alcohol on a paper cut—now imagine doing that inside a sensitive ear canal. Your dog will never let you touch their ears again. Dr. Sue Ettinger, a well-known veterinarian, often emphasizes that keeping the experience positive is just as important as the cleaning itself. If you hurt them once, the "ear cleaning dance" becomes a wrestling match for the rest of their life.
Why Witch Hazel and Vinegar Are Risky
I see this on "natural" pet blogs all the time. People suggest mixing 50/50 water and white vinegar or using straight witch hazel. Please, just don't. While vinegar is acidic, the water content in a homemade mix often stays trapped in the ear. Moisture is the enemy. Professional-grade ear wash for dogs is specifically formulated to evaporate quickly. Homemade concoctions often leave the canal damp, which is basically an invitation for Malassezia (yeast) to throw a party and multiply.
Witch hazel can be okay for a quick wipe of the outer flap, but it’s often too drying for the internal canal. Dry skin cracks. Cracked skin gets infected. It’s a vicious cycle that you want to avoid.
How to Actually Use the Wash Without Ruining Your Relationship
Most people make the mistake of sticking a Q-tip down into the canal. Stop. Just stop. You’re not "cleaning" when you do that; you’re a human trash compactor. You are packing the wax and hair down against the eardrum.
Instead, follow the "fill and massage" method.
- Gently pull the ear flap (the pinna) upward toward the ceiling to straighten out that L-shaped canal.
- Fill the canal with the ear wash for dogs until you can actually see the liquid pooling at the top. Yes, it feels like a lot. It’s fine.
- This is the crucial part: Massage the base of the ear for about 30 to 60 seconds. You should hear a squishing sound. That sound is the liquid breaking up the debris.
- Let go and step back. Your dog is going to shake. They will shake hard. This is good! The centrifugal force flings the loosened gunk out of the deep canal into the outer ear.
- Use a cotton ball or a soft gauze square to wipe away the mess you see on the outside.
If you see deep-seated debris that you can't reach with a cotton ball, leave it. If the wash did its job, the dog's natural "epithelial migration" will move that stuff outward over the next 24 hours.
When the Wash Isn't Enough: Identifying Infections
Sometimes, a bottle of ear wash for dogs is like bringing a squirt gun to a forest fire. It’s not going to solve the problem if there is an active infection. You need to know the signs of a "Vet Trip Required" situation.
If the ear smells like old gym socks or sweet fermented bread, that’s yeast. If it smells like a literal sewer, you’re likely dealing with a bacterial infection, possibly Pseudomonas. These are painful. If your dog yelps when you touch their ear, or if the skin looks like the texture of an orange peel (cobblestoning), put the wash away and call the clinic. Using a cleaner on a ruptured eardrum can actually cause permanent neurological damage or deafness. Vets use an otoscope to check the integrity of the tympanic membrane before they prescribe anything. You can't see that far down with a flashlight, so don't guess.
Chronic ear issues are often just a symptom of something else. Allergies are the number one culprit. According to the American College of Veterinary Dermatology, a huge percentage of dogs with recurrent ear infections are actually reacting to something in their food or environment. If you're cleaning your dog's ears every three days and they’re still gunky, you aren't dealing with a "dirty ear" problem; you're dealing with an inflammation problem.
Real-World Examples: Breed Specific Needs
Not all ears are created equal. A Greyhound has upright ears that get plenty of airflow. They rarely need an intensive ear wash for dogs. On the other hand, consider the Cocker Spaniel. Their ears are heavy, velvet curtains that seal off the ear canal from the world. No air gets in. It’s a literal incubator.
Then you have Poodles and Doodles. They have hair growing inside the canal. Some groomers swear by plucking it, while many modern vets suggest leaving it alone unless it’s causing a specific problem. If you do use a wash on a dog with hairy canals, you have to be extra diligent about making sure the ear dries out afterward.
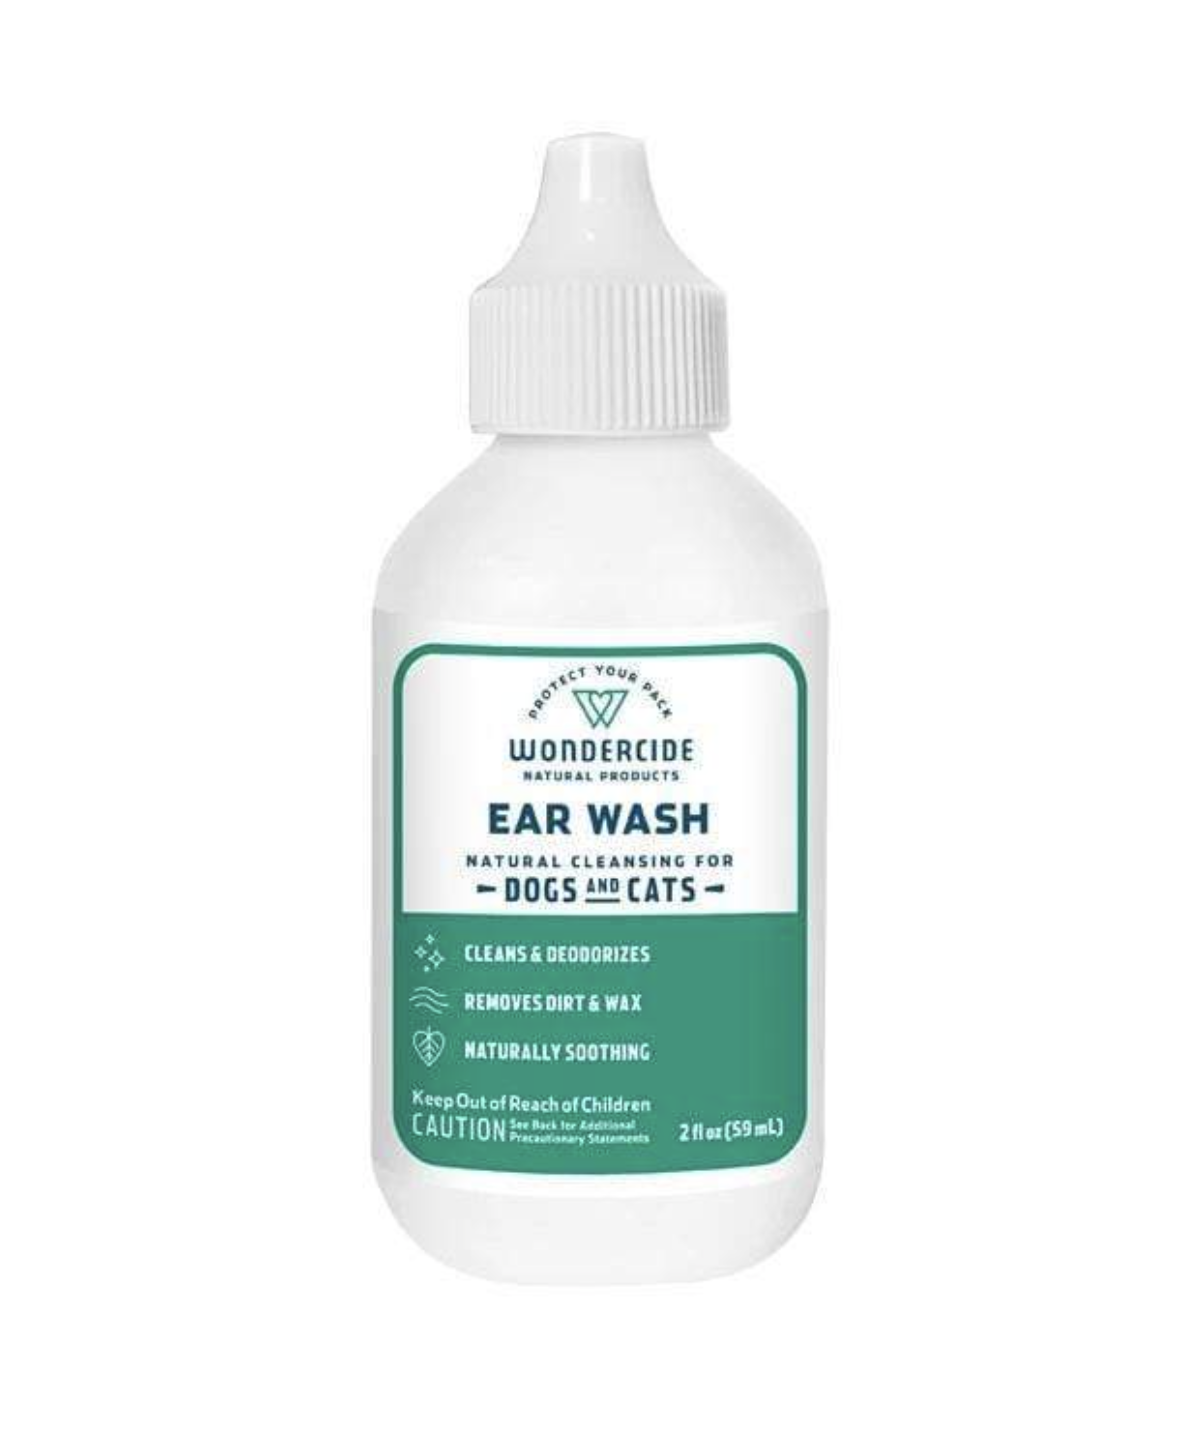
Picking the Right Product
- For Waxy Ears: Look for Dechra TrizEDTA or something with squalene. These are powerhouses for breaking down buildup.
- For Smelly/Yeasty Ears: Look for Virbac Epi-Otic Advanced. It has a low pH and helps prevent microbes from attaching to the skin.
- For Sensitive Souls: Zymox Otic is a fan favorite because it uses enzymes (like lactoperoxidase) rather than harsh chemicals. It’s often used as a "leave-in" treatment, which is a bit different from a standard wash.
Actionable Steps for a Healthier Dog
Start by doing a "sniff test" once a week. You should know what your dog’s ears smell like when they are healthy. Usually, they shouldn't smell like much of anything.
Get your supplies ready before you even call the dog over. If you're fumbling with the bottle cap while trying to hold a wriggling Labrador, you’ve already lost. Warm the bottle in your hands for a few minutes. Cold liquid hitting a warm ear canal is an incredibly jarring sensation for a dog. Warming it to body temperature makes a massive difference in how they tolerate the process.
Reward them. Not just with a "good boy," but with the high-value stuff. Roast chicken, cheese, whatever. You want them to think that the ear wash for dogs is just a weird prelude to a steak dinner.
Finally, keep a log. If you notice the ears get worse every time your dog eats a specific protein or every time the pollen count spikes in the spring, you’ve just handed your vet the most valuable diagnostic tool they could ask for. Managing ear health is a long game, but with the right wash and a bit of patience, you can definitely keep the "thwack-thwack-thwack" of head shaking to a minimum.
Make sure you always dry the visible parts of the ear thoroughly after any water activity or cleaning. Moisture is the catalyst for almost every ear problem you'll face. Use a dry cotton ball and just gently pat the crevices of the outer ear until no more moisture comes away. Consistency beats intensity every single time when it comes to canine hygiene.