Stop fighting it. Seriously. Most people approach a black-tie event or a wedding by trying to beat their curls into submission with a flat iron before they even think about an upstyle. It’s a mess. You end up with hair that feels like straw and looks like a Victorian doll that’s seen better days. The real trick to curly hair formal updos isn't about heat; it's about physics and timing.
I’ve spent years watching stylists at high-end salons like Ouidad or DevaChan work their magic, and the secret is almost always "second-day hair." Freshly washed curls are too slippery. They’re too bouncy. They don't have the "grit" needed to stay pinned up for six hours of dancing. If you want that effortless, romantic look that actually stays put, you have to lean into the chaos of your natural pattern.
The Foundation Nobody Tells You About
You’ve probably heard that you need a ton of hairspray. You don't. In fact, heavy-duty hairspray is the enemy of a good curly updo because it creates a "crunch" that looks dated under professional photography lighting. Instead, focus on moisture.
Hydrated curls clump better. When they clump, they create natural shapes that act as the architecture for your style. If your hair is dry, it fizzes. Frizz isn't bad—it actually adds volume—but there’s a difference between intentional volume and "I walked through a humid parking lot" frizz.
Before you even touch a bobby pin, you need to prep. Use a water-based leave-in. I’m a fan of stuff like the As I Am Leave-In Conditioner or Pattern Beauty’s heavier creams if you have Type 4 coils. You want the hair to feel supple. If you can't run your fingers through a section without it snapping, you aren't ready to style.
Curly Hair Formal Updos and the Pineapple Myth
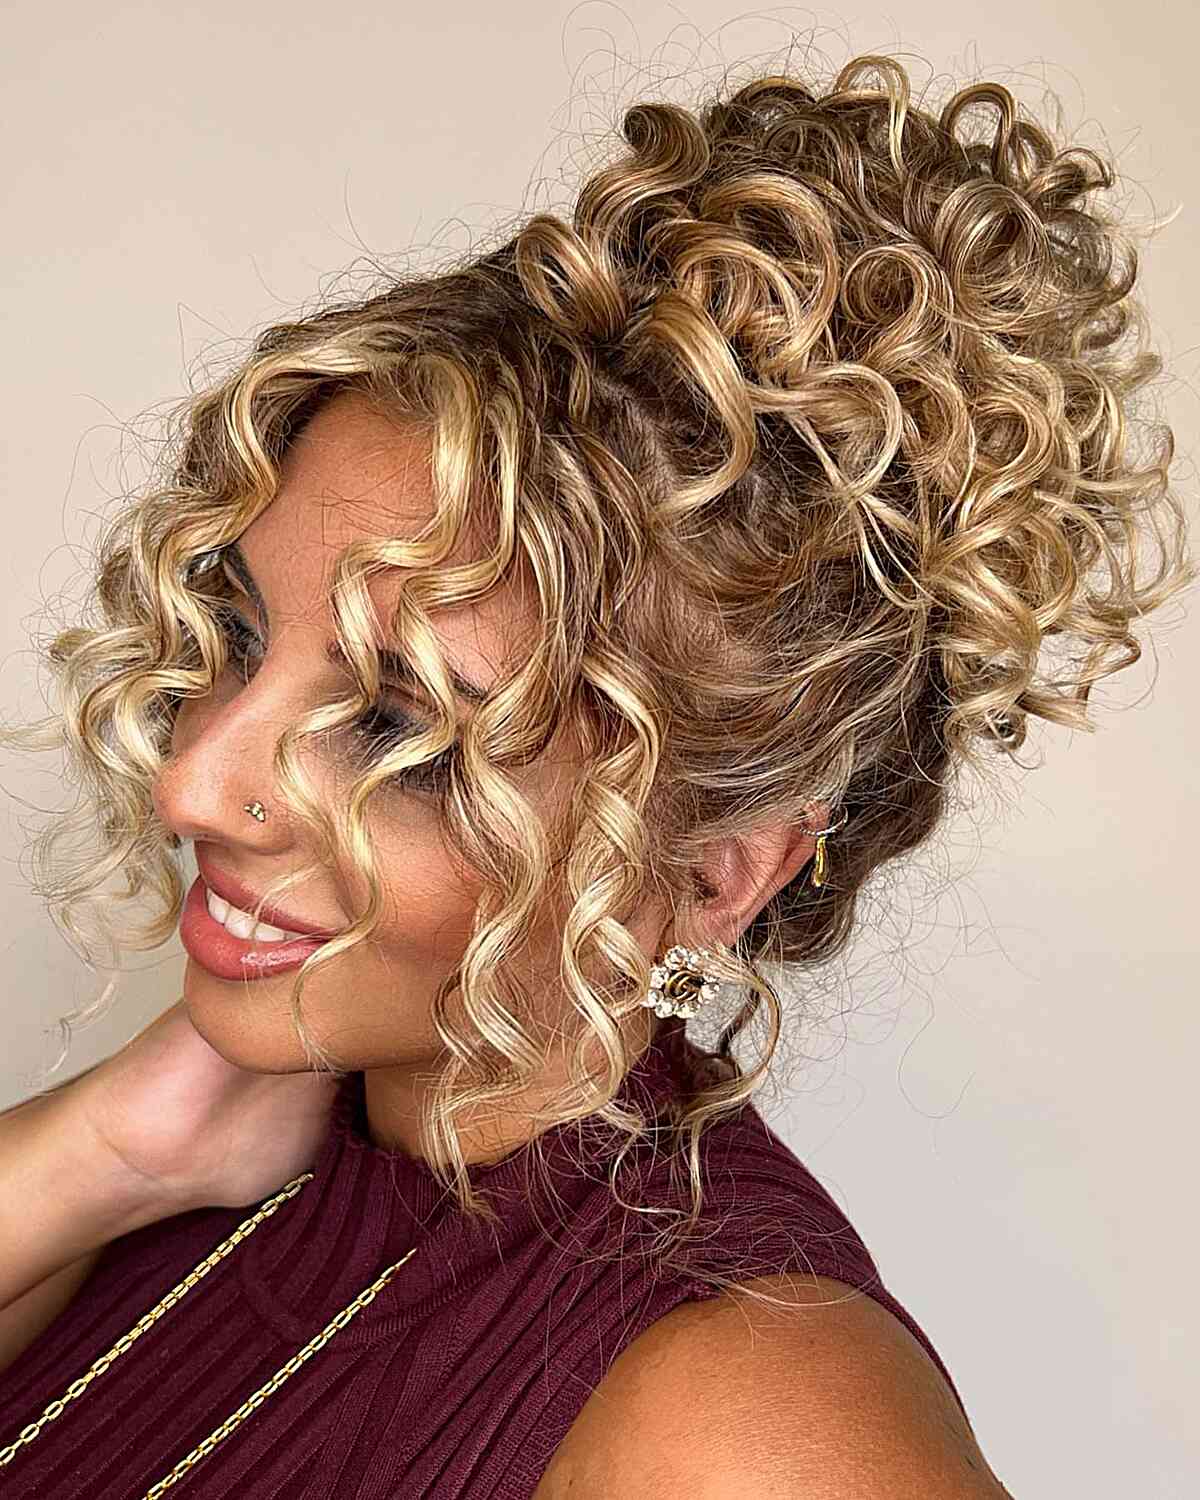
Everyone talks about the "pineapple" for sleeping, but did you know it’s basically the blueprint for the best formal styles? A high, loose pile of curls on the crown of the head is the base for 70% of the red carpet looks you see on stars like Yara Shahidi or Nathalie Emmanuel.
It's simple. You flip your head over. You gather the hair at the very top—higher than you think. Secure it with a silk scrunchie, not a rubber band. Rubber bands are hair killers. Once it's up there, you just start pinning individual curls back toward the base.
Don't overthink the placement.
If you try to make it symmetrical, it will look weird. Humans aren't symmetrical. Let a few tendrils fall around the ears. It softens the jawline. Use "U" shaped pins instead of standard bobby pins for this. Standard pins clamp down too hard and flatten the curl. U-pins (often called French pins) just hold the weight in place while letting the curl keep its 3D shape. It's a game changer for curly hair formal updos.
Product Selection: The "Grit" Factor
You need something to give the hair "teeth." If your hair is fine, a sea salt spray might work, but it can be drying. A better option is a dry texture spray. Oribe Dry Texturizing Spray is the gold standard for a reason, though it's pricey. A cheaper alternative is the Kristin Ess Dry Finish Working Texture Spray.
Spray it at the roots. Massage it in. Feel that? That’s the grip.
Now, when you slide a pin in, it actually stays. Without that grip, your heavy curls will just slide right out by the time the appetizers are served.
The Low Chignon for Textured Hair
If the high-volume "pineapple" look feels too loud for your event, the low chignon is your best friend. But don't do a slick-back. Slicking back curly hair usually results in those weird "lumps" near the ears where the hair is trying to escape.
- Start by defining your part. A deep side part looks incredibly sophisticated on curls.
- Leave out two generous sections at the front, near your temples.
- Pull the rest into a low, loose ponytail at the nape of the neck.
- Loop the ponytail through itself to create a messy bun.
- Now, take those front sections. Twist them loosely away from your face.
- Wrap them around the base of the bun and pin.
This creates a "halo" effect that looks like you spent three hours with a professional, even if you did it in fifteen minutes in your bathroom while sipping a latte.
Why Tension is Your Secret Weapon
Let’s talk about the "snag." When you’re working with curly hair formal updos, tension is what creates the "formal" part of the look. If everything is loose, it looks like you’re going to the grocery store. If everything is tight, you look like you’re in a dance recital.
The balance is found in the nape and the sides. Keep the hair tight against the scalp on the sides of your head. This draws the eye upward and emphasizes your cheekbones. Then, let the "bulk" of the hair—the bun or the pile of curls—be the loose, airy part. This contrast between the sleek sides and the voluminous texture is what makes a style look intentional.
Common Mistakes That Ruin the Look
Honestly, the biggest mistake is using a brush. Put the brush down. If you brush out your curls before an updo, you’re just creating a giant cloud of fluff that has no structural integrity. Use your fingers. Your fingers can feel where the tangles are and work around them without breaking the curl pattern.
Another one? Using too many pins.
If you need fifty pins to hold your hair up, your sectioning is wrong. A well-constructed updo should feel secure with about ten to fifteen pins. If it feels heavy or like it's pulling on your scalp, take it down. That tension will give you a headache by hour three, and no amount of champagne will fix that.
Dealing with Weather and Humidity
If your formal event is outdoors, you have to plan for the "shrinkage" or the "swell." Humidity makes curly hair grow. If you start with a tight, intricate style, the humidity will turn it into a frizzy mess. For outdoor summer weddings, go for a braided updo.
Braids lock the hair in place. A crown braid or a series of Dutch braids fed into a low bun is practically bulletproof. Even if the humidity hits 90%, the braids will hold the structure, and any frizz just looks like "boho texture." It’s a safety net for your face.
Expert Insight: The Scalp Matters
People forget the scalp. When you pull curly hair up, you often expose parts of the scalp that usually stay hidden. If you have any thinning or just wide parts, use a root touch-up powder. Topik or even a matte eyeshadow that matches your hair color can fill in those gaps. It makes the hair look twice as thick in photos.
Also, watch your edges. You don't need to "lay" them with a toothbrush and gel if that's not your vibe, but a little bit of edge control or a light pomade helps the style look finished. It bridges the gap between the "wild" curls and the "formal" setting.
The "End of Night" Strategy
Don't rip the pins out.
I’ve seen so many people come home from a gala and just yank at their hair. You’ll snap your strands. Find the ends of the pins, open them slightly, and slide them out the way they went in. If you used a lot of product, don't try to brush it out that night. Just hop in the shower, soak your hair in conditioner, and let the product melt away.
Actionable Steps for Your Next Event
If you have a formal event coming up, don't wait until the day of to experiment. Curly hair is unpredictable. It has a personality. Sometimes it cooperates, sometimes it wants to be difficult.
- Trial Run: Three days before the event, try the style. See how long it takes for the curls to "settle."
- Wash Schedule: Figure out your wash day. Most curly updos look best on day two or day three hair. Plan your shower accordingly.
- The Kit: Buy high-quality U-pins and a silk scrunchie. Avoid the cheap metal pins with the rough tips that can tear the hair cuticle.
- Mirror Check: Check the back. Use a handheld mirror. What looks good from the front might look like a bird's nest from behind.
- Accessories: When in doubt, add a pearl pin or a gold clip. It instantly elevates a simple bun into a "formal updo" category.
The beauty of curly hair is that it already has the volume and interest built-in. You don't need to add extensions or use a curling iron to create fake texture. You already have the most sought-after hair type for updos. Just give it a little direction, a little grip, and the right pins, and it will do the rest of the work for you. Be patient with the process. Texture is a gift, not a problem to be solved.