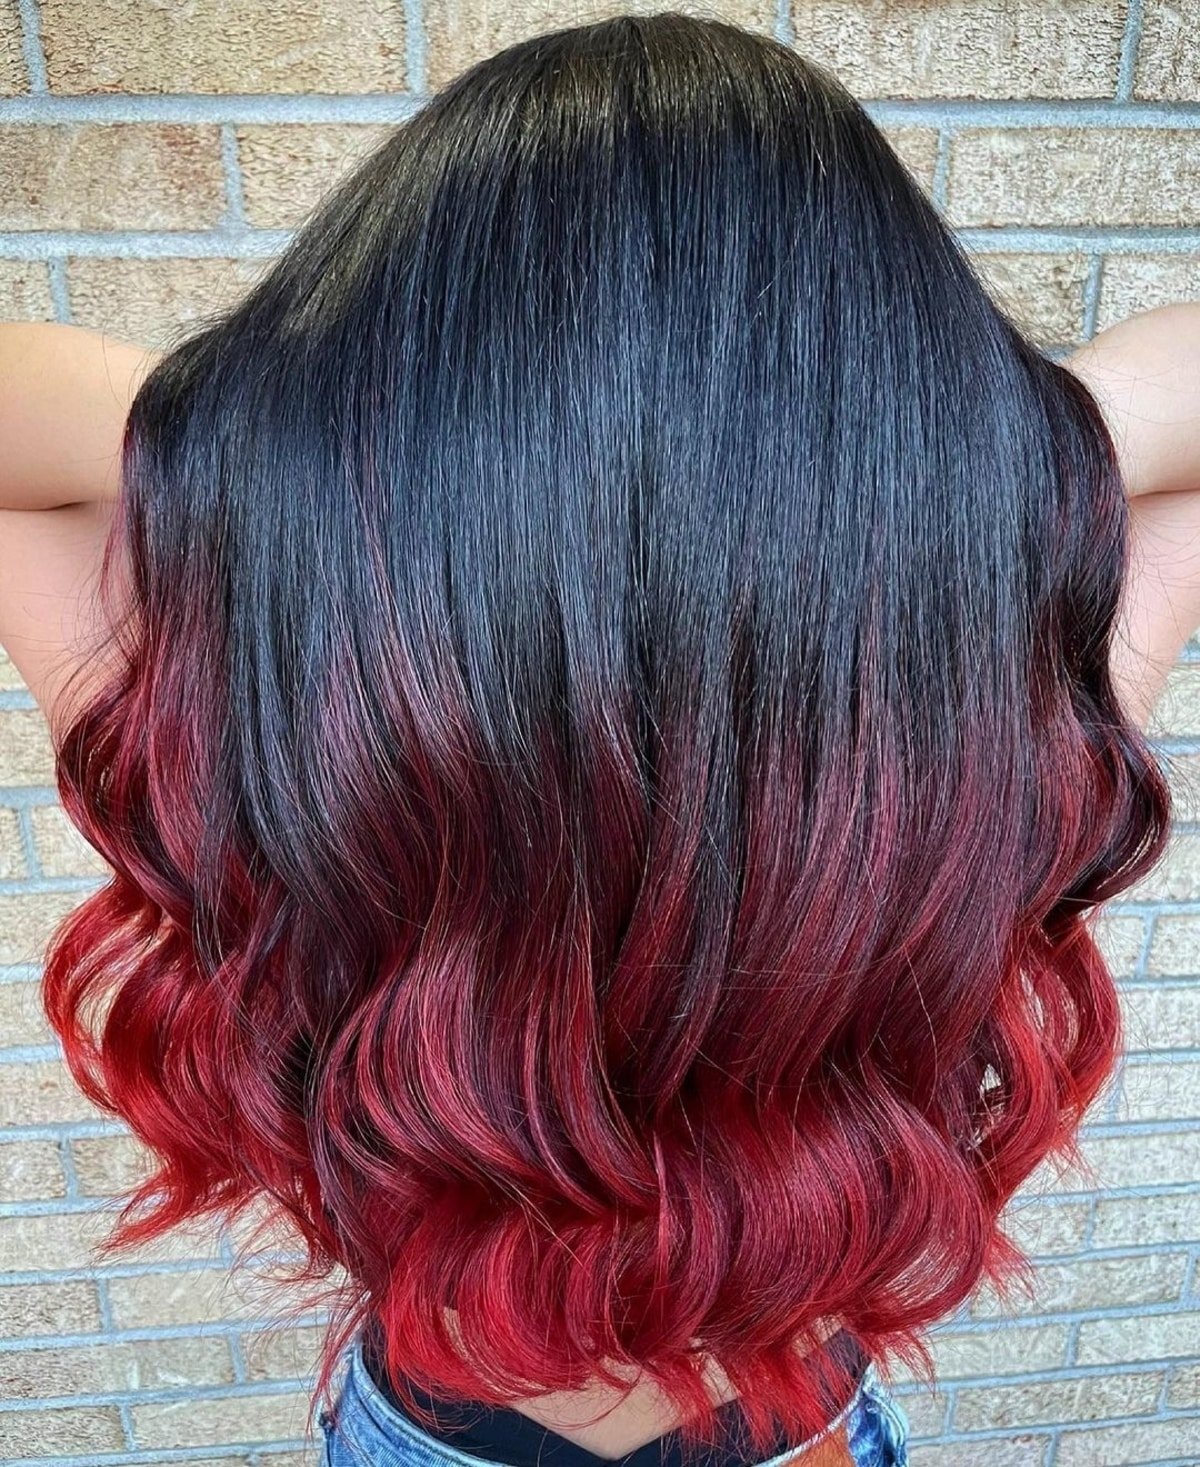
It is a vibe. Honestly, there isn't really a better way to put it. You’ve seen it on everyone from 90s era Gwen Stefani to Rihanna’s iconic 2010 Loud era, and even current TikTok influencers who are obsessed with the "E-girl" or "Alt" aesthetic. Black hair and red streaks provide a level of contrast that most other color combinations just can't touch. It’s high-drama. It’s moody. It’s basically the leather jacket of hair color.
But here is the thing about going red on black: it can go south incredibly fast if you don't know what you're doing. I've seen people end up with muddy orange patches or, even worse, hair that feels like literal straw because they tried to blast through level 1 pigment with 40-volume developer in one sitting. You can’t just slap some crimson over jet-black strands and expect it to pop. It’s physics. Or, well, chemistry.
Why the Contrast Works So Well
Visually, black and red sit in a very specific place on the color hierarchy. Black is the ultimate neutral—it absorbs all light. Red, specifically high-chroma red, has some of the largest color molecules in the hair dye world. When you put them together, the red doesn't just sit there; it vibrates against the dark background.
Most people think "red" is just one color. It’s not. You have your cherry reds, your deep bordeaux, and those bright, almost-neon copper-reds. If you have cool-toned black hair (think blue-black), a cool toned raspberry red looks insane. If your black hair is more of a natural, warm "off-black," then a fire-engine red or a sunset orange-red is going to look way more harmonious.
The Science of Lightening Dark Hair
You have to lift. Unless you are using a "high-lift" dye specifically formulated for dark hair—like the L’Oreal Excellence HiColor line that many DIYers swear by—you are going to need bleach.
Think of your hair like a piece of black construction paper. If you take a red Crayola marker and draw on it, what do you see? Nothing. Maybe a faint, greasy sheen if you hold it up to a lightbulb. But if you take white-out, make a stripe, and then use the red marker? It’s electric. That’s exactly how black hair and red streaks work.
The lifting process involves breaking down the melanin in your hair. Black hair is packed with eumelanin. As you bleach it, it goes from black to brown, then red, then orange, then yellow. For a vibrant red, you actually don't need to go all the way to "inside of a banana" yellow. Usually, hitting an orange stage (Level 7 or 8) is perfect because the underlying orange actually helps the red look warmer and more saturated.
The Problem With Red Molecules
Red hair dye is notoriously clingy and flaky at the same time. It’s the "bad boyfriend" of the hair world. It stains everything—your pillowcases, your towels, your shower curtain—but it refuses to stay inside the hair shaft.
Why? Because the molecules are huge. They struggle to get deep into the cortex, so they just sort of hang out near the surface. Every time you wash your hair with hot water, the cuticle lifts, and those big red molecules just slide right out. This is why people complain that their red streaks look "washed out" after just three shampoos.
Real-World Styles That Actually Look Good
Don't just do "chunky highlights" like it's 2002 unless that is specifically the Y2K look you're chasing.
- The Money Piece: This is just two bold streaks right at the front. It frames the face and gives you that high-contrast look without ruining the integrity of your entire head of hair.
- The Peek-a-Boo: You hide the red in the bottom layers. When your hair is down, you’re a professional. When you put it in a half-up-half-down style or a ponytail? Boom. Fire.
- The Halo: A circular section around the crown. It’s a bit more "editorial" and definitely harder to maintain, but it looks incredible in photos.
- The Balayage Blend: Instead of "streaks," you do hand-painted ribbons. It’s more subtle. Well, as subtle as red on black can be.
How to Not Ruin Your Hair
I cannot stress this enough: cold water. If you want to keep black hair and red streaks looking fresh, you have to shower like a penguin. Cold water keeps the hair cuticle closed. If you use steaming hot water, you might as well just pour your expensive dye directly down the drain.
You also need a color-depositing conditioner. Products like Celeb Luxury Viral Colorwash or Keracolor Clenditioner are lifesavers. They basically add a tiny bit of pigment back into the hair every time you wash it. It’s the only way to keep that "just-left-the-salon" vibrancy for more than a week.
Also, sulfate-free shampoo is not a suggestion; it’s a requirement. Sulfates are surfactants—basically detergents—that are great at cutting grease but also great at stripping away color. Look for something like the Pureology Revive line or even a basic SheaMoisture sulfate-free option.
A Quick Word on "Box Dye"
Look, I get it. A $10 box of "Power Red" from the drugstore is tempting. But box dyes are formulated with "one size fits all" developers, usually 30 or 40 volume. That is often way too aggressive for the average person's hair, leading to "hot roots" where the hair near your scalp turns bright orange while the ends stay dark. If you can afford it, go to a pro. If you can't, at least buy professional-grade lightener and a separate developer from a place like Sally Beauty so you can control the strength.
The Maintenance Reality Check
Let's be real for a second. Black hair and red streaks is a high-maintenance relationship.
- Frequency: You’ll need a toner refresh every 3 to 4 weeks.
- Staining: Your sweat might be pink at the gym for the first week. Don't wear white shirts.
- Dryness: Bleaching even small sections changes the porosity of your hair. You're going to need protein treatments (like Aphogee) or moisture masks (like Amika Soulfood) to keep the streaks from looking frizzy compared to the rest of your sleek black hair.
Common Misconceptions
People think red hair makes you look washed out. It’s actually the opposite—if you pick the right red. If you have very pale skin with cool undertones, a deep "Black Cherry" red can actually make your skin look more luminous. If you have deep, olive, or golden skin tones, a bright "Fire Engine" or "True Red" creates a stunning, regal contrast.
Another myth? That you can't go back. While red is hard to get out of hair, it’s actually very easy to cover up with black or dark brown. So, if you hate it after a month, you aren't stuck. You just dye over it. The only real "permanent" change is the bleach damage underneath, so as long as you didn't fry your hair to get there, the stakes are actually pretty low.
Actionable Steps for Your Hair Journey
If you’re ready to pull the trigger on this look, here is exactly how to do it without ending up in a "hair fail" compilation:
Step 1: The Strand Test. I know it's boring. Do it anyway. Take a tiny snippet of hair from the back of your head and apply the lightener. See how long it takes to reach an orange/gold color. This tells you exactly how long you need to leave the chemicals on your head without guessing.
Step 2: Sectioning. Clean sections are the difference between "cool streaks" and "accidental splotches." Use alligator clips. If you want face-framing streaks, use a rat-tail comb to get a perfectly straight line from your part down to your ear.
Step 3: The Lightening. Apply your lightener. If you are doing this at home, 20-volume developer is usually the safest bet for most people. It works slower, which gives you more time to apply it evenly.
Step 4: The Pigment. Once you've rinsed the bleach and dried your hair (dye sticks better to dry hair!), saturate those lightened sections with a semi-permanent red. Brands like Arctic Fox (Ritual or Poison), Adore, or Manic Panic (Vampire Red) are great because they don't have peroxide or ammonia, so you can leave them on for an hour to really let the pigment soak in without causing more damage.
Step 5: The Seal. Rinse with the coldest water you can stand. Use a pH-balancing sealer or just a really good acidic conditioner to lock that cuticle down tight.
Keep your heat styling to a minimum after you're done. Flat irons are essentially "color erasers." If you have to use heat, use a high-quality protectant spray. Otherwise, you’ll watch your beautiful red streaks turn into a dull, brownish-pink within minutes of styling.
This color combo is a statement. It’s bold, it’s a little bit rebellious, and when done right, it’s one of the most striking looks you can pull off. Just remember: cold water is your best friend, and red dye is a commitment, not a casual fling.